Have you heard the Arduino and wondering what it is?
Arduino is one of the best electronic components that depends on using hardware and software conveniently. It was invented in IIDI (Ivrea Interaction Design Institute). As early as it was expanding in the community, the new challenges have taken places for android boards. The challenge was discrimination its offers that were from 8-bit boards to product for IoT applications and inserted settings.
Arduino boards are the type of boards to whom you can easily tell “what to do by sending an arrangement of directions to the microcontroller” on the board. The main feature of these board is that it allows the user ease-of-use without any kind of restrictions or any kind of rules and regulations for full filling their basic needs. If you are not sure what microcontroller is? Then this article has you covered.
What is microcontroller?
A microcontroller is a circuit board that has a chip on it that can be programmed to do many different things. You can read information from sensors. For instance, if you have the board to read how bright it is in the room, you can use photoresistor which is sensitive to light or you can detect when someone walks into a room with this motion sensor. Even GPS receiver is a sensor. It tells your project where on the globe it is?
Now that’s just a small sample of different kinds of input that sensors provide but what you can do with that data. Using output, you can control devices or display and store data. For instance, you can have your Arduino simply blink an LED.
For something bit more useful you can hook it up to the power Switch tail. It lets you control the power to your AC devices like your lamps and appliances. The LCD readout will let your Arduino display text information and you can also have sensors values go right into your computer for storing or processing. We’re just scratching the surface of different input and output that we can use with the Arduino. There is way too much out there to cover in a single article. But let’s take a look at
Arduino can play a major role in a basic project. But How?
Let’s say you want your living room lights to turn off when you press play on your DVR or DVD players remote so that you can enjoy your movie in the dark automatically. To make this happen, we’ll need a sensor that can read the light that comes out of the remote control. It looks like this (Picture) and it’s called an infrared sensor and how do we turn off the lights, we use the power switch tail which we’ve mentioned before. It plugs into your wall and you plug your lamp into it. One wire we will use to control the power switch inside. So how these work together. Well, that‘s where the Arduino comes in. We’ll hook both of them up to the Arduino pins and wire. Some code to upload to the board, using free software in a very basic overview code that we upload to the Arduino will be checking to see if the sensor has received any pulses of infrared light from the remote.
You can also master yourself in Arduino Uno in 15 minutes.
If the pattern of flashed matches the pattern of flash we know to be for play the Arduino will send the signal to the power switch tail to cut the power to the lamps. We could then enhance this projects. So that when we hit stop or pause the lights turn back on, it’s just a matter of updating the code and uploading it to the board. You can reprogram these boards over and over again.
There is so much you can do with the Arduino. It’s a kind of incredible. We used infrared for my enough already projects which listened to the closed captioning track from the TV and would mute the TV whenever someone was mentioned that we didn’t hear about. So, that’s just a small sample of what you can do with an Arduino. Our best advice is to jump right in and start playing around. We “The Ewall” offers these great getting started with Arduino kits that have everything you need to start exploring possibilities. And if you’re looking an inspiration, it’s not far.
Why Arduino?
Customers are using Arduino in a lot of projects and applications. If any beginner wants to learn the Arduino software, then it is not too much difficult to learn. You can easily run the software on windows, mac, and Linux. It is a key apparatus to learn new things. Anybody - kids, specialists, developers - can begin tinkering simply adhering to the well-ordered guidelines of a pack, or sharing thoughts online with different individuals from the Arduino people group. Artist’s intuitive models and specialists utilize it for installation and to examine new melodic instruments.
There are a lot of micro controller's platforms that are feasible for physical computing. There are a lot of comparable tools that do the same work. For example, MIT’s handy board, Phidgets, Parallax Basic Stamps, and Netmedia’s BX-24.
Advantages of Arduino
It can also cooperate with microcontrollers but there are some other PROFITS for tutors, learners, and enthusiasts over other systems.
- Low cost
- Extendable Software
- Extendable hardware
- Easy to use developing background
- Can easily work on different operating systems
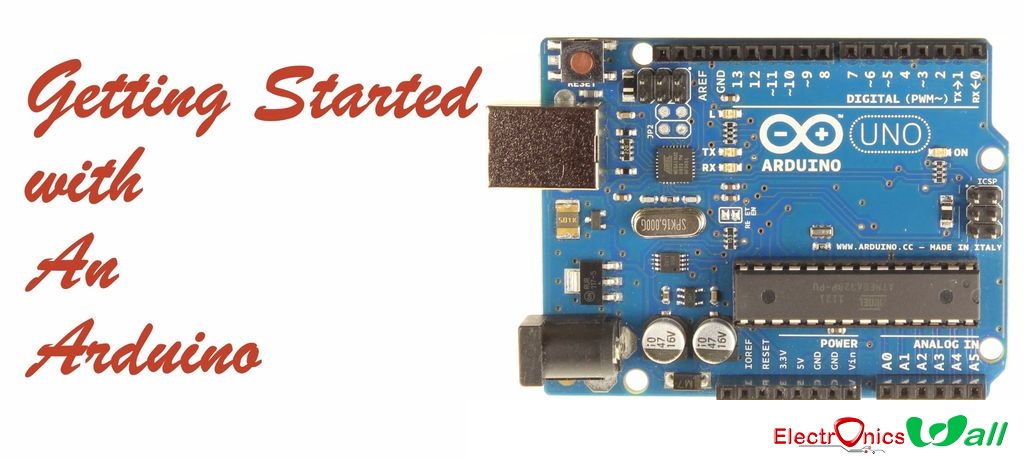
What is on the board of Arduino?
Arduino boards are available in a lot of varieties. You can use them for completing various functions. In all Arduino boards, majority parts are same but are a little bit different from each other. Some important components of Arduino are
- Pins (5V, 3.3V, GND, Analog, Digital, PWM, AREF)
- Reset Button
- Power LED Indicator
- Power (USB/barrel Jack)
- TX RX LEDs
- Voltage
- Main IC
Arduino Board Types
There are a lot of types of Arduino boards that are almost the same but are different in some features. Some of them are mentioned below
- Arduino Uno
- Arduino Lilypad
- Arduino mega 2560
- Arduino Leonardo
- Arduino Due
Features of the Arduino Boards
Arduino Boards | Processor | Memory | Digital I/O | Analog I/O |
Arduino Uno | 16 Mhz ATmega328 | 2KB SRAM, 32KB flash | 14 | 6 input, 0 output |
Arduino Due | 84Mhz AT91SAM3X8E | 96KB SRAM, 512KB flash | 54 | 12 input, 2 output |
Arduino Mega | 16Mhz ATmega2560 | 8KB SRAM, 256KB flash | 54 | 16 input, 0 output |
Arduino Leonardo | 16Mhz ATmega32u4 | 2.5KB SRAM, 32KB flash | 20 | 12 input, |